As my friend Atash asked me to translate it for him into English and as I guess more people can find it useful, here it is:
- The final button will look similar to

so, let's start!
- open a new photoshop document of 100 by 100 pixels.
- you can put your logo or anything you want to have the "effect"; in this case, I put Neoflashers logo on an orange background

- right click on the layer where our image is and select blending options
- on the blending options window, select drop shadow and change the settings as in the image below

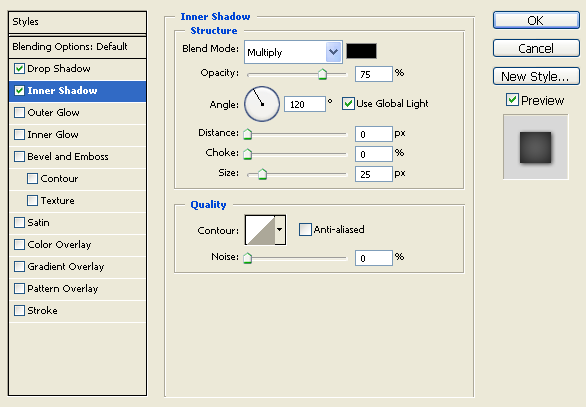
- without closing the blending options window, select inner shadow and change the settings as shown in the image below
- click ok to close the blending options window and from the tools, select the "eliptical marquee tool" (if you have the "rectangular marquee tool" selected by default, click on it to select the needed one)
- create a new layer on top of the one that contains our logo or image and on this new layer, create an eliptical shape as shown in the image below

- select the "Gradient Tool", if you have the "Paint bucket tool" selected, click on it to be able to select the "gradient tool", and create a gradation from the top of the elipse to its bottom by pressing the mouse left key and dragging the mouse where the elipse finishes. You will have something similar to:

- deselect and change the layers opacity to 70% and that's it!
you should have a button similar to:
salut!
1 comment:
Its nice to see the tutorial on the budge button. Thanks for the posting and keep posting like that.I am looking for some more button on your blog.
Post a Comment